
This little adventure of the past few days definitely deserves someone to tell its story, so I decided to post about it on my blog, which hasn’t seen much love in a long while. To summarize it : my machine wouldn’t boot, and I tried to fix the windows bootloader and it was much harder than it should have been.
Background
A few months ago, my wife was due for a new PC, so instead of buying one, and since I have a dozen at home from Purism, I lent her the Librem 15 v2 that I had sitting around unused. Unfortunately, that particular unit had some issues which made using it a bit annoying (trying to suspend will cause a reboot, and you can’t shut it down, it will turn itself back on on its own) but it did the job and it was much better than her 10 years old (and extremely loud rattling/noisy) Thinkpad X200.
Every few weeks, I would “borrow” the Librem 15 v2 and attempt to finish porting coreboot to it. In the past week, I’ve finally finished the coreboot port and released it. Unfortunately, her Windows would refuse to boot once Coreboot gets installed. I assume it’s because Windows was installed with EFI and coreboot+SeaBIOS only supports legacy BIOS mode (I could install TianoCore as the payload to get EFI support, but I didn’t want to do that, so I figured I’ll just fix the Windows machine so it can boot from Legacy.. how hard can it be, right ?
First attempt
So, Windows doesn’t want to boot, so let’s go into the Windows 10 installation drive and do a “Startup repair”, that didn’t work, then I followed the various tutorials online and I tried the “bootrec /rebuildbcd” and “bootrec /fixboot” and “bootrec /fixmbr” and still nothing, I even found the “bootsec /nt60 C:” trick, but it still didn’t help, then I figured, maybe since the system was installed in EFI, it fixes the boot but it would only work if I still booted as EFI (regardless of how the installation drive was booted), so I found/used EaseUS Partition Manager to transform the GPT partition table into an MBR partition which shouldn’t really make a difference, but technically GPT is required for EFI so by using MBR, I would effectively force it to be bootable by a legacy BIOS. Again, I did all the steps to fix the MBR/BCD/boot, etc.. Still nothing… Then I decided to delete the EFI partition entirely and retry, still no luck.. Then I thought “ok, maybe the problem is this specific HDD model that doesn’t work with SeaBIOS for some reason?” so I used CloneZilla to clone the HDD into an NVMe drive I had in the machine, then I tried to boot into it. I still get the same result, it prints “Booting from Hard Disk…” and nothing else, none of the “No OS found” or “partition error” or whatever those standard error messages the windows bootloader should print.
So, the problem is not the HDD, but at least now I have a backup of the HDD in the NVMe drive and I can try to mess with it without risk of data loss, so I spent another few hours tweaking and playing around with settings and Windows tools, etc.. and still I got nothing. Then I had an idea. What if I install grub and use grub to boot into Windows! That’s a great idea, now to find how to install grub without having a linux system installed. For some reason, from the CloneZilla live USB, I couldn’t install grub, so I switched to my PureOS live USB, and I managed to install grub on the NVMe drive, but it had no config. I created a partition for it, but “update-grub” wouldn’t work, that’s because the “/” path is mounted as “overlay” and the grub-probe command doesn’t know how to handle that, so I had to edit /usr/sbin/grub-mkconfig to make it use “/mnt” instead of “/” or “/boot” when calling the grub-probe command, so, that partially worked.. unfortunately, grub-probe is also used in the various files in /etc/grub.d/ and even though I gave grub-mkconfig the ‘-o /mnt/grub/grub.cfg’ path, the files in /etc/grub.d/ had some /boot hard coded in them, so I just mounted the partition into the /boot directory and that fixed everything!
Now I boot and I see the grub menu, it shows me the Windows installation from the NVMe and from the HDD, but booting them both gives me the same weird error : “δRÉNTFS” and that’s it.. this weird delta, R, accented E then NTFS being printed in the screen and nothing else… I decided to see if I could restore things now with the windows installation disk, so I did the ‘startup repair’ and all the “bootrec” commands, and I can confirm that grub was removed and replaced by (I assume) the windows bootloader, but unfortunately, it still didn’t help, because now it was giving me this same “δRÉNTFS” again. I assume the NTFS partition was corrupted somehow or something like that.
I’ve now spent way too many hours (during 2 days) trying to get this to work, so I decided to just ask my wife “I kind of broke your HDD from your old laptop, how about a clean windows install, you’d still have all your files, but you’d need to re-configure it, and reinstall all your apps, etc..” and she freaked out at first because she thought I said that all the data was lost, and when I said “your old laptop”, she thought I was talking about the Thinkpad X200. I had actually decided to just upgrade her to a non-broken librem (Librem 15 v3) because one that doesn’t shut down or suspend isn’t really great for every day use, so when I said “old laptop”, I meant the librem 15 v2.. So, it turns out, the Librem HDD itself was nearly empty (I think 20 or 30GB used, so discounting the windows install itself, not much personal data on it) and she still hadn’t copied any data from the thinkpad to the Librem.
Second attempt
So, I realized “oh wait, what if I used the HDD from the thinkpad instead, that one probably doesn’t use an EFI bootloader anyway”.
Unfortunately, I remembered why I hadn’t put the thinkpad’s hdd into the old Librem 15 v2, it was because that HDD was too thick (I guess 9 mm but the librem only supports 7mm drives) so it wouldn’t fit.
Thankfully, I had a SATA to usb adapter that I used, and when I tried to boot into it.. SUCCESS! It boots, oh wait, Blue Screen of Death… and it reboots… damn it, now it enters into “startup repair” mode which doesn’t let me do anything because it can’t figure out what’s wrong. the BSOD was going so fast that I had to film it then go image by image to be able to see the STOP code (which was 0x0000007b) and it didn’t help me, other than “use startup repair” or “remove bootloader virus” as the usual advice on the internet…
Before I messed anything up, I went ahead and made another clone with CloneZilla from the HDD into the NVMe, but I would get the same BSOD when running from the NVMe.. Now I decided I’ll start messing with the disk in the startup repair, and I noticed, it can’t find the hard drive, no matter what, the hard drive isn’t visible to the startup repair mode of Windows… I realized, maybe it’s because this is Windows 7, not Windows 10 and it has no NVMe drivers! So I looked for the NVMe drivers and put them on a USB stick, and clicking the “Load drivers” in Windows 7 startup repair showed me that there was no USB stick… apparently, there also are no USB drivers.. Also when I looked for solutions to the BSOD, one solution I saw was “go to BIOS settings and change the SATA settings from AHCI to IDE”.. but there is no such setting in coreboot of course and I didn’t plan on recompiling coreboot just for that, it had to work without changes), so that makes sense, if the Windows installation can’t access to its files, that’s why it does the BSOD, and if it can’t talk to either the original HDD connected via USB (no USB drivers) or to the clone on the NVMe driver (no NVMe drivers), then that’s the problem.. so I swapped out the HDD for another one of my test HDDs that I wasn’t using and I cloned the drive from the NVMe back into a slim HDD that could fit into the Librem.
Now, finally, it boots!!! Now all that I need to do, is install drivers on this Windows 7 instance, I figured I’ll also upgrade to Windows 10 while we’re at it, then I’ll clone (again) from this HDD back into the NVMe drive, and it should all work then.
Getting Windows to work
Now, this wasn’t the hardest part, but it was probably the most annoying… I had to install drivers on this machine, but USB doesn’t work, Wifi doesn’t work, there is no Ethernet either, so I had to find drivers on my other machine, put them on USB, boot into a Live USB of PureOS, then mount the Windows HDD, copy the files from USB to the HDD, then reboot into Windows, then try to get it to work. Unfortunately, the first “USB 3.0 xHCI controller” drivers that I installed was apparently not the right one, and the drivers for the Wifi card weren’t recognized by Windows.. eventually, I found the “Chipset driver” on Intel’s website and that worked, suddenly I got the audio speakers working and I could change the resolution to something other than 800×600, but the PC was still **extremely** slow.. I’m going to blame it on the HDD or something because the CPU would only be used to 1%, but everything was incredibly slow. It doesn’t matter, I’ll just go through it as slow as it is.. but after spending 30 minutes just to get to the device manager and to realize you got the wrong driver, it sucks, especially since you need to reboot into a live USB of linux in order to copy a different one again on the HDD.
Anyways, eventually, I found the correct USB 3.0 xHCI controller driver (from Intel’s website), which made the USB work in theory, but it didn’t want to actually work.. the Windows 10 USB installer wouldn’t appear.. I had also installed the NVMe drivers, but the partition on the NVMe drive didn’t appear either… Eventually, I noticed that the Windows 10 USB that was appearing in the device manager didn’t have a driver, so I had to re-install the usb mass storage driver.. I did find the proper wifi driver, which I installed, then I let Windows find the driver for the USB stick online and install it. Then finally, it said “Your device is ready to use”, but the drive still didn’t appear in “My PC”.. so I opened the disk management tool, and from there, I see that it was mounted on “D:”. I also found that the NVMe drive was indeed recognized by Windows, but it had a little warning next to it that said this drive is offline because one of its partitions conflicts with one that is already mounted… Of course! Since the two drives are clones of one another, it means that they have the same partition GUID or whatever, so Windows couldn’t mount them both. Ok, but why is it saying that the Windows 10 Installer is mounted as “D:” when I can clearly see that “D:” is my NAS.. but the NAS is appearing as ‘disconnected’, well, it turns out this is a bug in Windows.. the NAS was disconnected, so “D:” drive was free, so it mounted the USB on “D:” but it didn’t show it in “my PC”, it was still showing “D: NAS \\NASNAME (Disconnected)” instead of “D: Windows 10”.. but if I clicked on the D: drive, instead of getting the “this drive is not accessible” error, instead, it was opening the USB stick.. :facepalm:
So I run the Windows 10 installer, it wants me to do a windows update first, which takes a couple of hours just “checking for updates”, and when I go to windows update manually, it says there are no new updates, so I just cancelled that, it froze, reboot, 30 minutes later, I can finally start the Windows 10 installer and I let it run… It reboots a few times, it even says “this is taking longer than usual” but eventually, the system is updated, all the files , apps, settings, etc.. are still there, and all the drivers are installed.
Finally, I can go back into CloneZilla and clone the newly-upgraded HDD back into the NVMe drive and call it a day!
What an adventure, and all of it because that stupid Windows refused to boot in Legacy BIOS. It should not have been this hard, I’ve seen tutorials, people saying to just call that “bootrec /fixmbr” and that should do it, but I think that in something I did, I somehow corrupted the partition or something so it wasn’t able to boot into it.
So, I cloned the HDD back into the NVMe and it worked! End of the adventure, great, thanks, bye bye…
Not so fast!
Humm.. yeah, actually, that didn’t work, when I boot the Windows on the NVMe, I get this error :
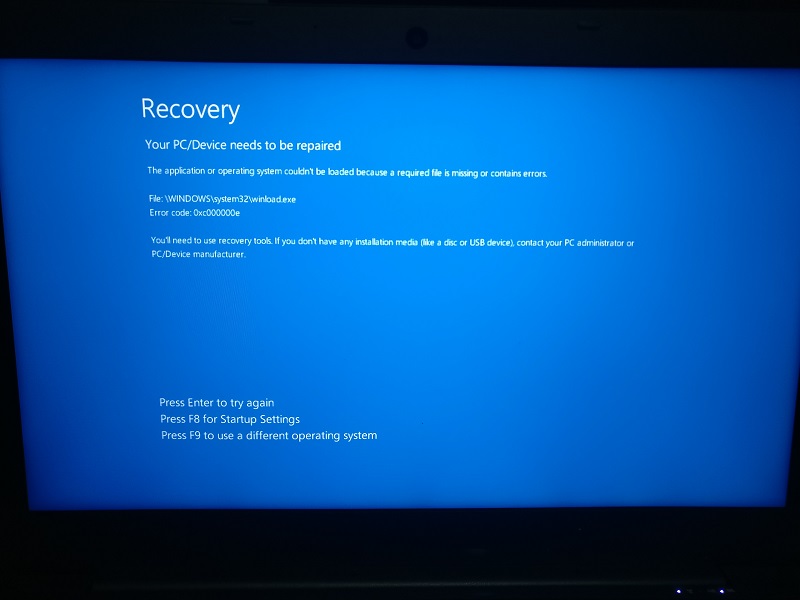
I checked and the C:\Windows\System32\winload.exe file does exist in the drive, so I’m not sure what’s wrong..
I think that I did boot successfully into the NVMe, but that was when the HDD was still in the machine, so I think it was running the bootloader from the NVMe then loading the winload.exe from the HDD then booting halfway from the HDD and halfway from the NVMe.
I tried again the usual startup repair and usual custom commands, but in the end, it didn’t work, and I realized “why am I bothering with NVMe?” and decided to just give up and try to clone the drive in a regular SATA SSD instead…
So the following day, while I’m backing up the data from my SATA SSD into another drive so I could clone the HDD into it, I decided to put the NVMe drive in another machine (since the Librem 15 v3 was being used to copy data from the SSD) to boot the NVMe and take a photo of this error for this blog post.. and magically, I got a different menu, one that tells me “Choose which OS you want to boot”, and it gives me three choices “Windows 10”, “Windows 10 Pro from volume 2” and “Windows 10 Pro” again.. If I select “Windows 10” or “Windows 10 Pro”, it reboots, and I get the above error message until I press F9 which it says “press F9 to use a different operating system”… hey, I didn’t have that F9 option when I tried this yesterday!
If I choose the “Windows 10 Pro from Volume 2” option, it boots right away into Windows, so.. it works! yes! finally! And this was on a machine with no SSD or HDD, just the NVMe drive, so there can’t be some other drive helping along the boot process. Unfortunately, every boot, it will ask me to make that choice.. I think a little “bootrec /rebuildbcd” will probably help fix that though.
So, I reboot into the recovery drive, I try the ‘bootrec /rebuildbcd’, it of course doesn’t find the Windows installation in “C:\Windows”, so I first had to run “attrib C:\Boot\BCD -h -r -s” to remove the “hidden/system/read-only” attributes on the C:\Boot\BCD file, then I could delete that file and when I re-run “bootrec /rebuildbcd”, it finds “C:\Windows”, and now, it boots right away into the NVMe drive. The problem is that the rebuildbcd doesn’t always work if it can’t overwrite the BCD file which is by default read-only.
I think what happened before was that since I thought everything was finally done, I removed the HDD and replaced it with the non-bootable one (from my first attempt), so I think when I was trying to repair the boot device with the windows installation drive, it was not fixing the NVMe drive, but the HDD one instead, or when it did fix it, it was telling it to boot Windows from the HDD which is non-bootable.. or something weird like that.
Either way, it doesn’t matter, because, now, finally, for real this time, it works, and I’m done!